![Featured image of post [IoT] Getting Started - Blinking the LED](/en/posts/2022030917/cover_hu239cd97c2920ec3fe76281922c9d138c_64038_800x0_resize_box_3.png)
Introduction
As a complete novice in IoT development, after several days of online research, I learned that:
ESP32https://www.espressif.com/zh-hans/products/socs/esp32 is the king of cost-performance (built-inWiFi+Bluetooth)- Raspberry Pi Pico is beginner-friendly and easy to blink LEDs
- To balance both cost-performance and ease of use, I bought both boards
- Both have official Taobao stores linked from their official websites: Raspberry Pi Espressif Systems
- Both boards cost around 20-30 RMB
Windows Environment Variables
- Right-click Computer (or open any folder and right-click “This PC”) -> Properties -> Advanced System Settings -> Environment Variables -> Double-click
PATH(System variables) -> Add new paths as needed
Go Installation
- Download from https://golang.google.cn/dl/
- Select the appropriate version, e.g., Windows 64-bit: https://golang.google.cn/dl/go1.17.8.windows-amd64.zip
- Add
C:\go\binto system PATH after extraction - Verify in new CMD:
go version
go version go1.17.8 windows/amd64
TinyGo Setup
- Follow official installation guide
- Download Windows 64-bit version: https://github.com/tinygo-org/tinygo/releases/download/v0.22.0/tinygo0.22.0.windows-amd64.zip
- Add
c:\tinygo\binto system PATH after extraction - Verify in new CMD:
tinygo version
tinygo version 0.22.0 windows/amd64 (using go version go1.17.5 and LLVM version 13.0.0)
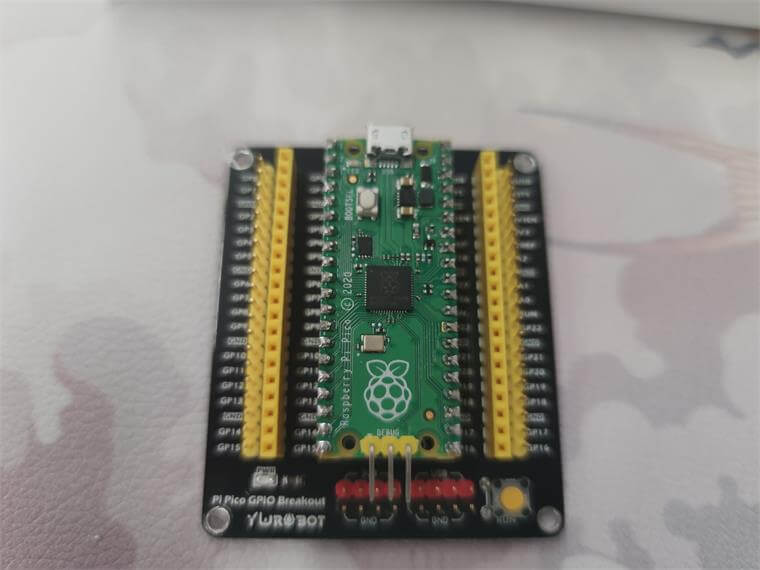
Raspberry Pi Pico
- Recommended to get an expansion board for easier pin access
- Pre-soldered headers save time - simply plug the dev board into the expansion board
-
First project: LED blinking. Pico is remarkably simple compared to ESP32 - no extra toolchain needed
-
Directly connect to PC via USB and flash code
-
To enter bootloader mode:
- Hold
BOOTSELbutton - Connect USB cable
- Release
BOOTSEL - Flash new code
- Hold
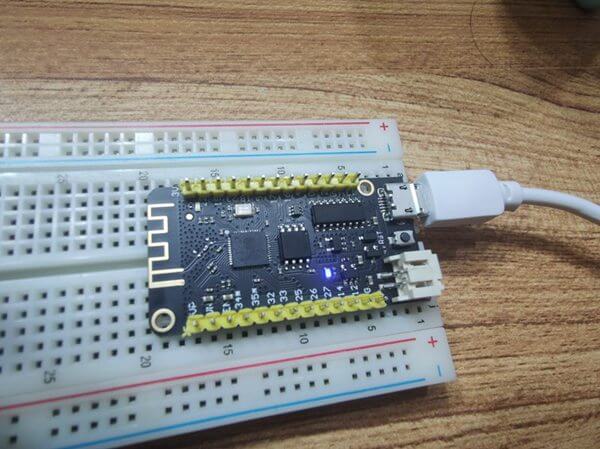
ESP32 Setup
Prerequisites
- Requires
makecommand - use MSYS2 on Windows - Official setup guide: https://docs.espressif.com/projects/esp-idf/en/release-v3.0/get-started/windows-setup.html
Installation Steps
- Install MINGW32 (recommend
C:\msys32)- Download: https://dl.espressif.com/dl/esp32_win32_msys2_environment_and_toolchain-20180110.zip
- Run
C:\msys32\mingw32.exefor MINGW32 terminal
- Get ESP-IDF
-
mkdir -p ~/esp && cd ~/esp
git clone -b release/v3.0 --recursive https://github.com/espressif/esp-idf.git
-
- Set IDF_PATH
-
echo "export IDF_PATH=\"C:/msys32/home/your-username/esp/esp-idf\"" > /etc/profile.d/export_idf_path.sh - Restart MINGW32 and verify:
printenv IDF_PATH
-
- Create Project
-
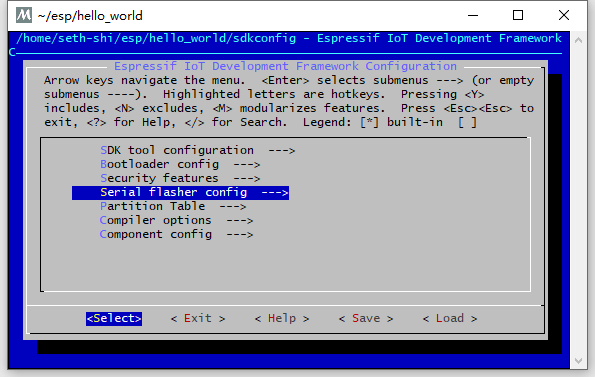
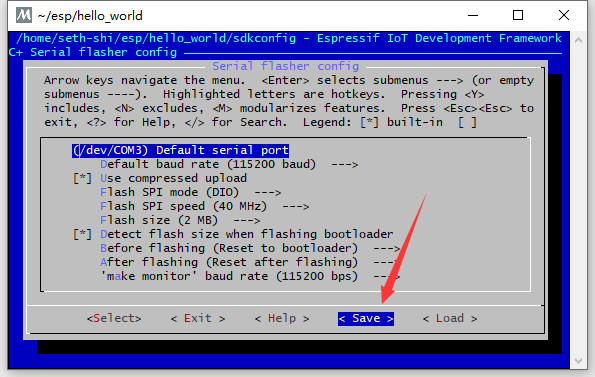
cd ~/esp cp -r $IDF_PATH/examples/get-started/hello_world . cd hello_world make menuconfig - Configure serial port under
Serial flasher config -> Default serial port
-
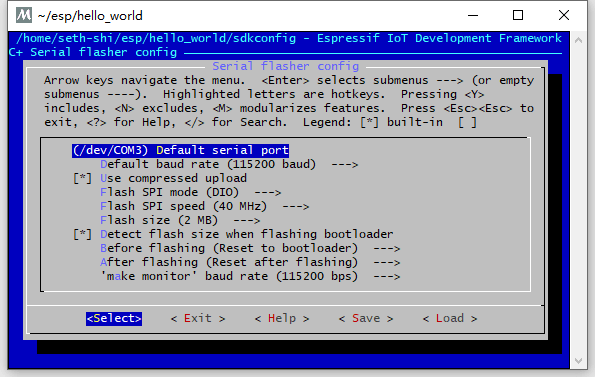
- Find COM port in Windows Device Manager
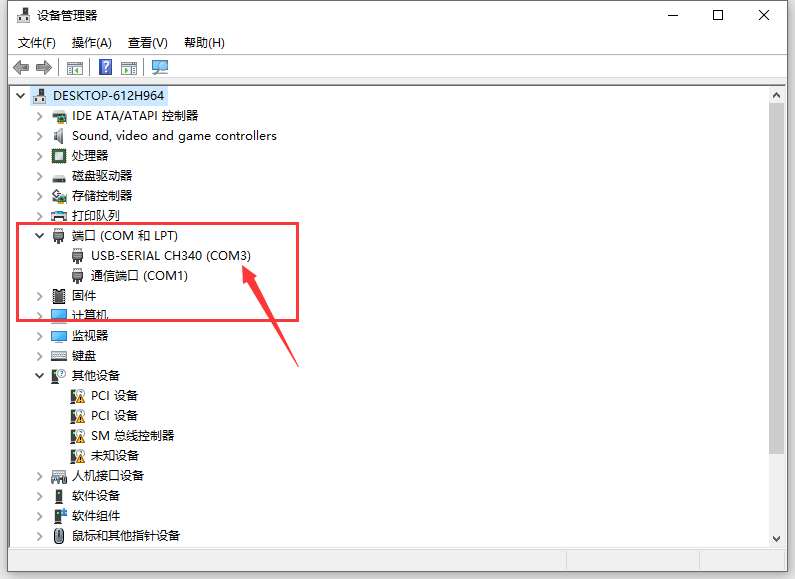
- Set correct COM port (e.g., COM3) and save
- Flash Firmware
-
make flash
-
Install esptool
-
pip install esptool -
Will update Raspberry Pi Pico section next time. Stay tuned!
Common Errors
Error 1
Makefile:8: C:/msys32/home/user-name/esp/esp-idf/make/project.mk: No such file or directory
make: *** No rule to make target 'C:/msys32/home/user-name/esp/esp-idf/make/project.m'. Stop.
- Fix: Verify
IDF_PATHin/etc/profile.d/export_idf_path.shuses correct username
Error 2
make flash: could not open port '/dev/ttyUSB0
- Fix: Ensure correct COM port is set in
make menuconfigconfiguration